


Friday, 24 January 2014
twitter bootstrap pop up using asp.net c#
In this post i will show creating twitter bootstrap pop up using asp.net c# .
the main problem of twitter bootstrap is button and any other control inside bootstrap content are not fire any asp.net event . After a long days its work me after change/modify some internal script of a bootstrap ..
the file is available to download at last section of this post .

Download files :
the main problem of twitter bootstrap is button and any other control inside bootstrap content are not fire any asp.net event . After a long days its work me after change/modify some internal script of a bootstrap ..
the file is available to download at last section of this post .
<html lang="en">
<head>

    <title>popup </title>

    <link href="bootstrap.min.css" rel="stylesheet" type="text/css">

    <link href="bootstrap-modal.css" rel="stylesheet" type="text/css">
</head>
<body >
<form id="form1" runat="server">
    <br />
    <h2>
        Bootstrap popup using asp.net c#
    </h2>

    <br />
      click here to lunch demo:
      <asp:LinkButton ID="LinkButton2" runat="server" href="#form_modal10" data-toggle="modal">click me</asp:LinkButton>

<div id="form_modal10" class="modal hide fade" >
    <div  id="2026">
        <div  style="padding-left:15px; height:145px">
           Bootstrap pop up using Asp.net
            <br /><br /><br />
            <asp:Label ID="Label1" runat="server" ></asp:Label>

            <asp:Button ID="Button1" runat="server" Text="click me" OnClick="submitclick" />

        </div>

    </div>

</div>
        <br />


 <script src="jquery-1.10.1.min.js" type="text/javascript"></script>
    <script src="jquery-migrate-1.2.1.min.js" type="text/javascript"></script>
<script src="bootstrap.min.js" type="text/javascript"></script>


</form>


 </body>
<!-- END BODY -->
</html>
.cs file
 protected void submitclick(object sender, EventArgs e)
    {

        Label1.Text = "button click work  ";

    }
video :
Download files :
stylish css3 progress bars using asp.net C#
In this post i will explain creating simple progress bar using css3 and java script technique
This css3 progress bar adapted from css-tricks.com . i am just explain how to access progress value from back end (asp.net c# format). all the credit for this beautiful progress bar goes to css-tricks.com.
lets start our progress bar in asp.net .
first of all download css and javascript from css-tricks
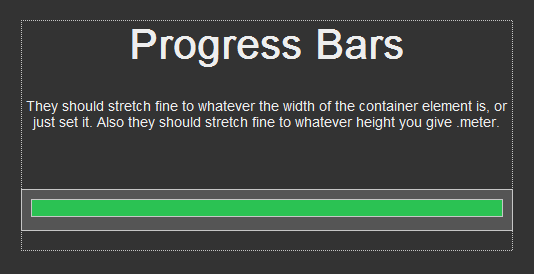
after download code and paste it into your project directory the design view look like this format.
 the aspx page and .cs section is shown below .

show action : you can download sample file.
This css3 progress bar adapted from css-tricks.com . i am just explain how to access progress value from back end (asp.net c# format). all the credit for this beautiful progress bar goes to css-tricks.com.
lets start our progress bar in asp.net .
first of all download css and javascript from css-tricks
after download code and paste it into your project directory the design view look like this format.
<html>

<head>


 <title>Progress Bars</title>

 <link href="css/style.css" rel="stylesheet"></link>

<script src="http://ajax.googleapis.com/ajax/libs/jquery/1.5.0/jquery.min.js" type="text/javascript">
</script>
 <script>
  $(function() {
   $(".meter > span").each(function() {
    $(this)
     .data("origWidth", $(this).width())
     .width(0)
     .animate({
      width: $(this).data("origWidth")
     }, 1200);
   });
  });
 </script>

 <style>
     //paste  css style from index.html
 </style>
</head>
<body>
 <div id="page-wrap">

   <h1>
Progress Bars</h1>
They should stretch fine to whatever the width of the container element is,
   or just set it. Also they should stretch fine to
whatever height you give .meter. <br />

  <div class="meter">
   <span id="progress" runat="server"></span>
  </div>
</div>
</body>
</html>
CS page shown below
 protected void Page_Load(object sender, EventArgs e)
    {
        string progr = "40";
        progress.Attributes.CssStyle["width"] = progr + "%";
    }
After compiling and run the project we will get the output in this format ... show action : you can download sample file.
Send Email using Asp.net c#
Today i will explain about how to send email using asp.net c# in simple method ..
this method send mail using smtp server.
the design section shown below:

After execute the above code you get email .ie in this format

this method send mail using smtp server.
the design section shown below:
<html xmlns="http://www.w3.org/1999/xhtml">
<head runat="server">
    <title>Untitled Page</title>
</head>
<body>
    <form id="form1" runat="server">
    <div>
        <asp:TextBox ID="emailto" runat="server"></asp:TextBox>
        <asp:Button ID="submit" runat="server" Text="send mail"
            onclick="submit_Click" />

        <br />
        <asp:Label ID="statustxt" runat="server"></asp:Label>
    </div>
    </form>
</body>
</html>
Add this one first to the page using System.Text;
   public bool send_mail(string to, string from, string subject, string body)
       {
        System.Net.Mail.MailMessage msg = new System.Net.Mail.MailMessage(from,to);
        msg.Subject = subject;
        System.Net.Mail.AlternateView view;
        System.Net.Mail.SmtpClient client;
        StringBuilder msgText = new StringBuilder();
        msgText.Append(" <html><body><br></body></html> <br><br><br>" + body);
        view = System.Net.Mail.AlternateView.CreateAlternateViewFromString(msgText.ToString(), null, "text/html");
        client = new System.Net.Mail.SmtpClient();
        msg.AlternateViews.Add(view);

        client.Host = "smtp.gmail.com";
        client.Port = 587;
        client.Credentials = new System.Net.NetworkCredential("your email address", "email password");
        client.EnableSsl = true;
        client.Send(msg);
        bool k = true;
        return k;
     }

    protected void  submit_Click(object sender, EventArgs e)
    {
        try
        {
             string to =emailto.Text;
            string From = "your email address";
            string subject = " Your Email Subject ";
            string Body = "Hello <br>welcome to dreamtheweb<br> Ths is a test mail from dreammtheweb.com ";

            Body += "<br><br> please visit http://dreamtheweb.com";
             Body += "<br><br>Thanks! <br>Jishnu chandran";
            bool result = send_mail(to, From, subject, Body);
            if (result == false)
            {
                statustxt.Text = "Mail sent successfully to" + emailto.Text;
            }
            else
            {
                statustxt.Text = "enter your correct mail id";
            }
        }
        catch
        {

            statustxt.Text = "Please check your internet connection";

        }

    }
In email address and password section you enter the corresponding email address and email password . After execute the above code you get email .ie in this format
Thursday, 23 January 2014
check postback in asp.net using javascript
read our previous articles how-to-disable-back-button-in-browser and prevent-page-refresh-on-button-click-in-asp.net
run code and view action ...
<html xmlns="http://www.w3.org/1999/xhtml" >

<head runat="server">

    <title>Untitled Page</title>

    <script type="text/javascript">
var check = <%= Page.IsPostBack ? "1" : "0" %>;
if(check==1)
{
alert("PostBack window");
}
else
{
alert("first window");
}
</script>
</head>
<body>
    <form id="form1" runat="server"  >
    <div>
  This exaple to check posback in asp.net c#


        <asp:Button ID="Button1" runat="server" Text="Button" />

    </div>

    </form>

</body>

</html>
run code and view action ...
pass textbox value into a javascript function using asp.net c#
Read our previous articles check-postback-in-asp.net and how-to-disable-back-button-in-browser
check and view result ...
<html xmlns="http://www.w3.org/1999/xhtml" >

<head id="Head1" runat="server">

    <title>Untitled Page</title>

<script type="text/javascript">
function function1()
{
var a=document.forms[0]["TextBox1"].value;
alert(a);
}
</script>

</head>

<body>

    <form id="form1" runat="server">

    <div>

              <asp:TextBox ID="TextBox1" runat="server"></asp:TextBox>


        <asp:Button ID="pass1" runat="server" OnClientClick="function1()"  Text="pass calue"

           />

    </div>

    </form>

</body>

</html>
check and view result ...
How to display table data in gridview (simple way)
Here i will explain about display table content in simple method using a gridview and SqlDataSource .
read change gridview field color based on value in database and export gridview data in excel .
the design view is shown below :

and the aspx code shown below

read change gridview field color based on value in database and export gridview data in excel .
the design view is shown below :
and the aspx code shown below
Add connectionstring to web.config file<asp:GridView ID="GridView1" runat="server" AutoGenerateColumns="False" CellPadding="4" DataKeyNames="id" DataSourceID="SqlDataSource1" ForeColor="#333333" GridLines="None" Width="392px"> <RowStyle BackColor="#EFF3FB" /> <Columns> <asp:BoundField DataField="id" HeaderText="id" InsertVisible="False" ReadOnly="True" SortExpression="id" /> <asp:BoundField DataField="name" HeaderText="name" SortExpression="name" /> <asp:BoundField DataField="email" HeaderText="email" SortExpression="email" /> <asp:BoundField DataField="age" HeaderText="age" SortExpression="age" /> <asp:BoundField DataField="phone" HeaderText="phone" SortExpression="phone" /> </Columns> <%-- Grid style--%> <FooterStyle BackColor="#507CD1" Font-Bold="True" ForeColor="White" /> <PagerStyle BackColor="#2461BF" ForeColor="White" HorizontalAlign="Center" /> <SelectedRowStyle BackColor="#D1DDF1" Font-Bold="True" ForeColor="#333333" /> <HeaderStyle BackColor="#507CD1" Font-Bold="True" ForeColor="White" /> <EditRowStyle BackColor="#2461BF" /> <AlternatingRowStyle BackColor="White" /> </asp:GridView><asp:SqlDataSource ID="SqlDataSource1" runat="server" ConnectionString="<%$ ConnectionStrings:dreamthewebConnectionString %>" SelectCommand="SELECT [id], [name], [email], [age], [phone] FROM [account]"> </asp:SqlDataSource>
after complete and run the page we well get output shown below<connectionStrings> <add name="dreamthewebConnectionString" connectionString="Data Source=JISHNU\SQLEXPRESS;Initial Catalog=dreamtheweb;Integrated Security=True" providerName="System.Data.SqlClient" /> </connectionStrings>